OpenCVCpp
数字图像处理(c++ opencv)入门学习 - 知乎 (zhihu.com)
Installing OpenCV on Windows for C++
Step 1 Download and Install OpenCV
Downloading and Installing OpenCV: Releases - OpenCV
2024年1月11日,最新版的OpenCV是4.9.0,我下载了的版本是OpenCV-4.8.0。下载解压到一个文件夹中。
1 | |
Step 2 Environment Variables
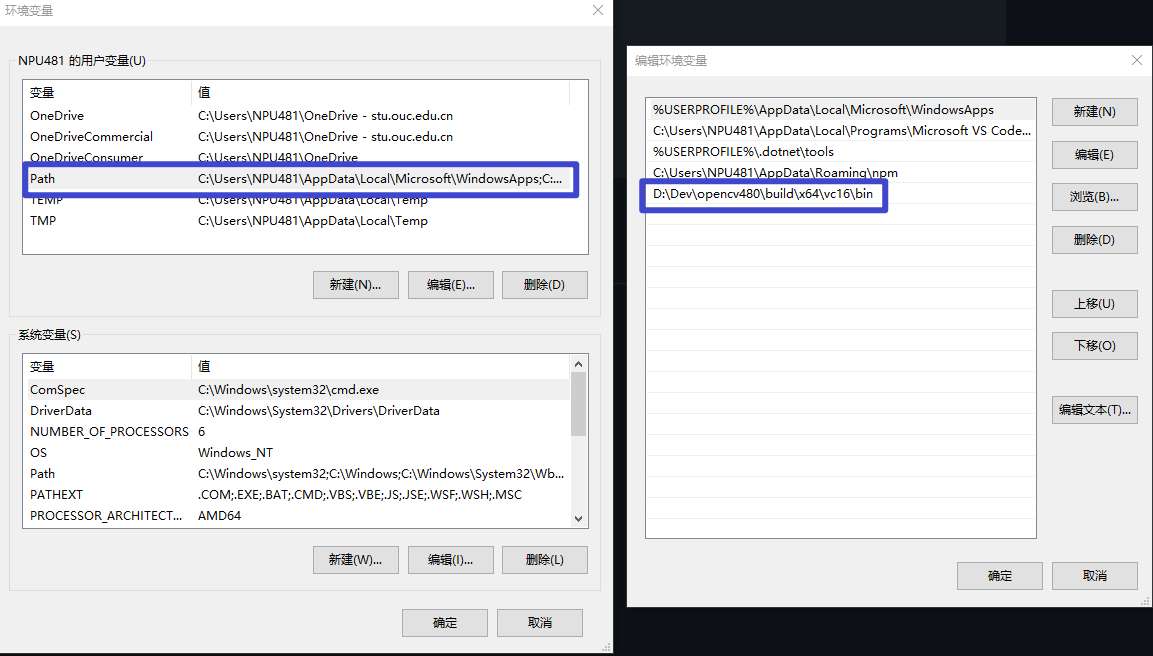
Add bin folder to Environment Variables path: D:\Dev\opencv480\build\x64\vc16\bin, then restart the PC.s

Step3 New Visual Studio Project
- Best VS setting(Cherno)
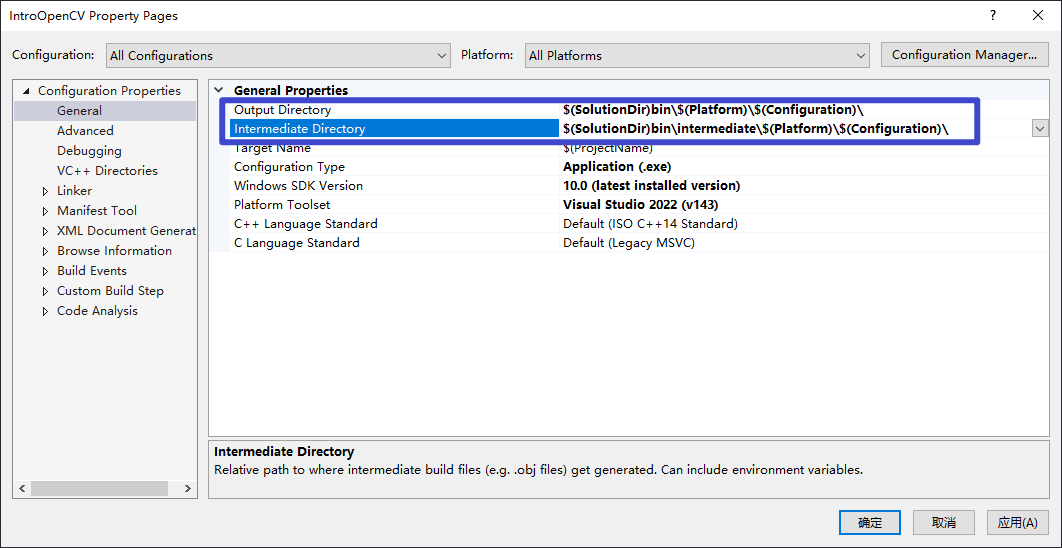
- Output Directory: $(SolutionDir)bin$(Platform)$(Configuration)\
- Intermediate Directory: $(SolutionDir)bin\intermediate$(Platform)$(Configuration)\
D:\userCode\IntroOpenCV\bin\Win32\Debug\
D:\userCode\IntroOpenCV\bin\intermediate\Win32\Debug\

- Set the platform target to x64

on
Step 4 OpenCV configuration
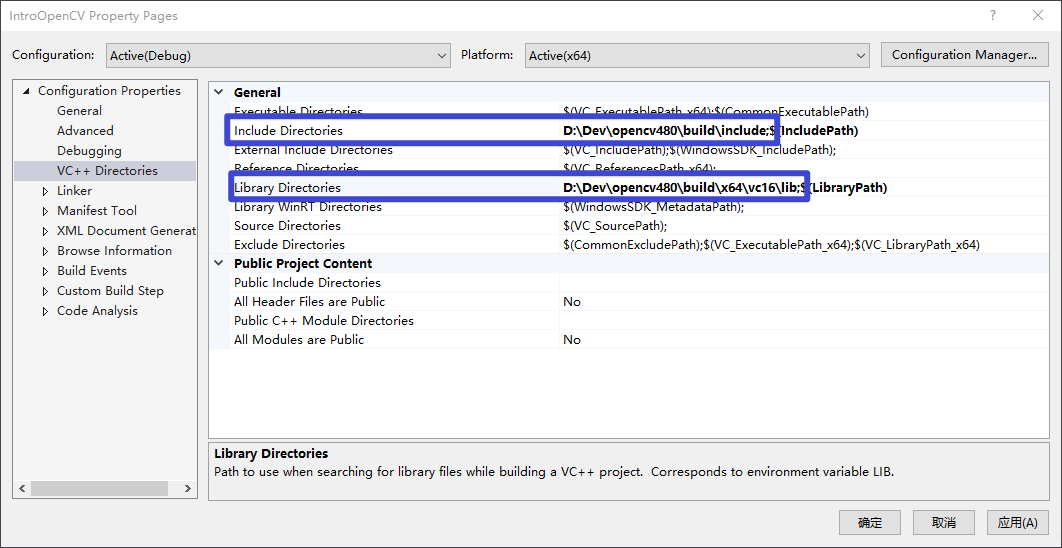
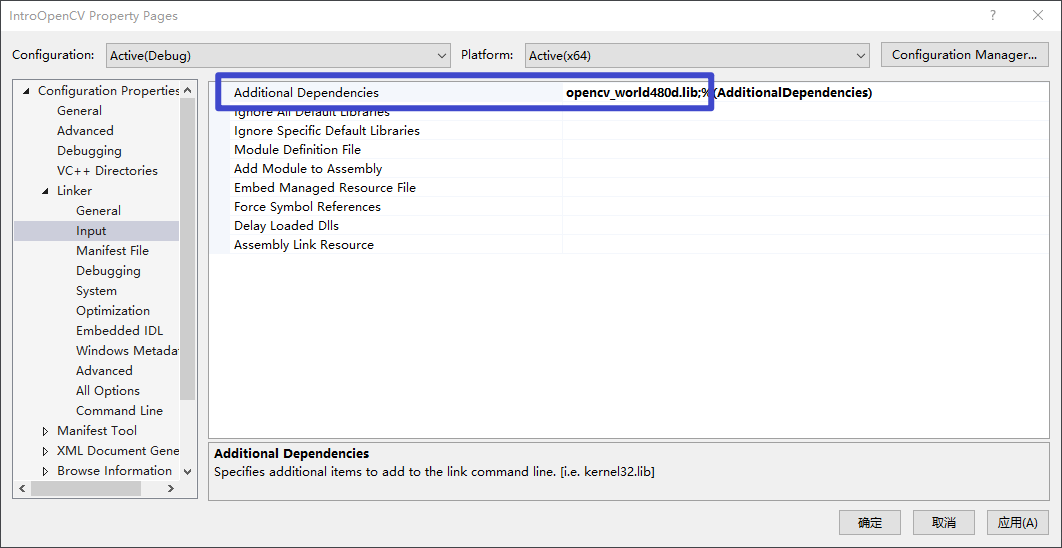
Add Directories by going to Project-Properties-Configuration Properties
1 | |


Step 5 Test
1 | |
Using VSCode and OpenCV in Windows
Installing OpenCV 4.8.0 on Ubuntu 20.04 for C++
reference:
- https://docs.opencv.org/4.x/d7/d9f/tutorial_linux_install.html
- https://blog.csdn.net/KIK9973/article/details/118830187
- https://www.cnblogs.com/booturbo/p/17399215.html
Source code downloading
- Download
opencv-4.8.0.zipSources in https://opencv.org/releases/ or https://github.com/opencv/opencv/releases/tag/4.8.0 - Download
opencv_contrib-4.8.0.zipSources in https://github.com/opencv/opencv_contrib/releases/tag/4.8.0 - unzip opencv-4.8.0.zip && unzip opencv_contrib-4.8.0.zip
build
- build opencv
1 | |
1 | |
1 | |
- environment config
- 修改etc/bash.bashrc
我们之前安装的时候 OPENCV_GENERATE_PKGCONFIG=ON 所以在/usr/local/lib/pkgconfig下生成了opencv4.pc文件,里面记录了OpenCV头文件、库文件的路径。需要进行如下配置:
1 | |
- check
1 | |
- 配置OpenCV的动态库环境
1 | |
- 测试OpenCV
1 | |
VSCode中配置OpenCV
reference: https://zhuanlan.zhihu.com/p/363035298
tasks.json
1 | |
c_cpp_properties.json
1 | |
launch.json
1 | |
OpenCVCpp
https://cosmicdusty.cc/post/Knowledge/OpenCVCpp/