1
2
3
4
5
6
7
8
9
10
11
12
13
14
15
16
17
18
19
20
21
22
23
24
25
26
27
28
29
30
31
32
33
34
35
36
37
38
39
40
41
42
43
44
45
46
47
48
49
50
51
52
53
54
55
56
57
58
59
60
61
62
63
64
65
66
67
68
69
70
71
72
73
74
75
76
77
78
79
80
81
82
83
84
85
86
87
88
89
90
91
92
93
94
95
96
97
98
99
100
101
102
103
104
105
106
107
108
109
110
111
112
113
114
115
116
117
118
119
120
121
122
123
124
125
126
127
128
129
130
131
132
133
134
135
136
137
138
139
140
141
142
143
144
145
146
147
148
149
150
151
152
153
154
155
156
157
158
159
160
161
162
163
164
|
#define BLINKER_WIFI
#define BLINKER_ALIGENIE_MULTI_OUTLET
#include <Blinker.h>
#include <ESP32Servo.h>
#include <Wire.h>
#include "SSD1306.h"
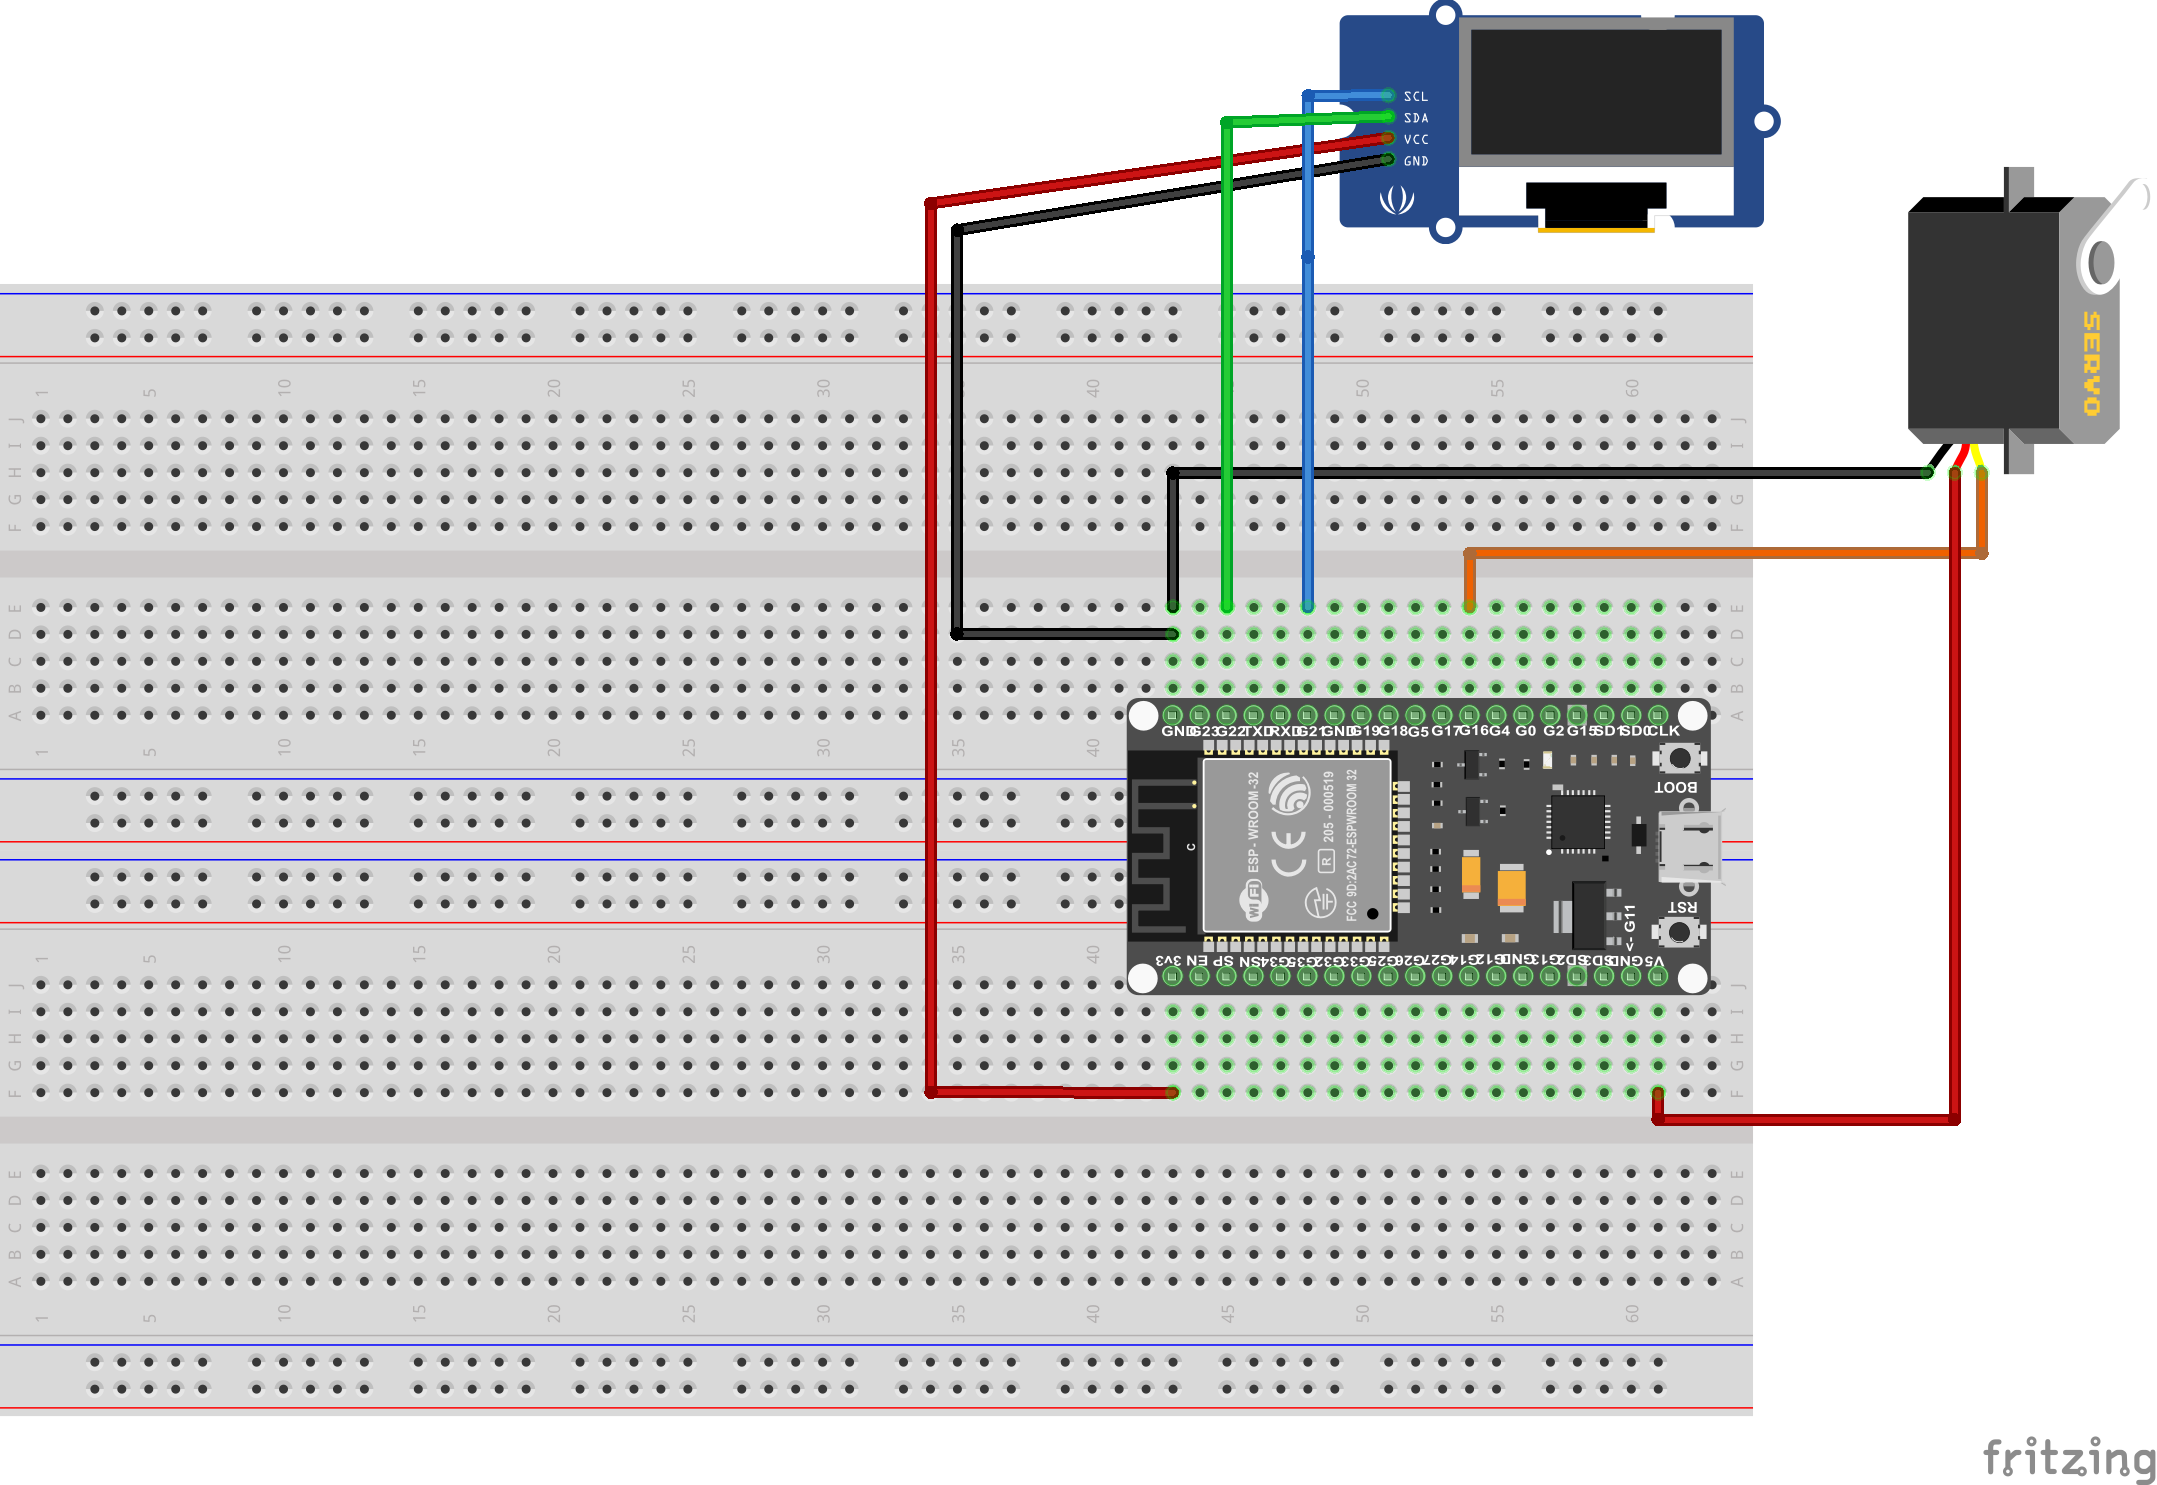
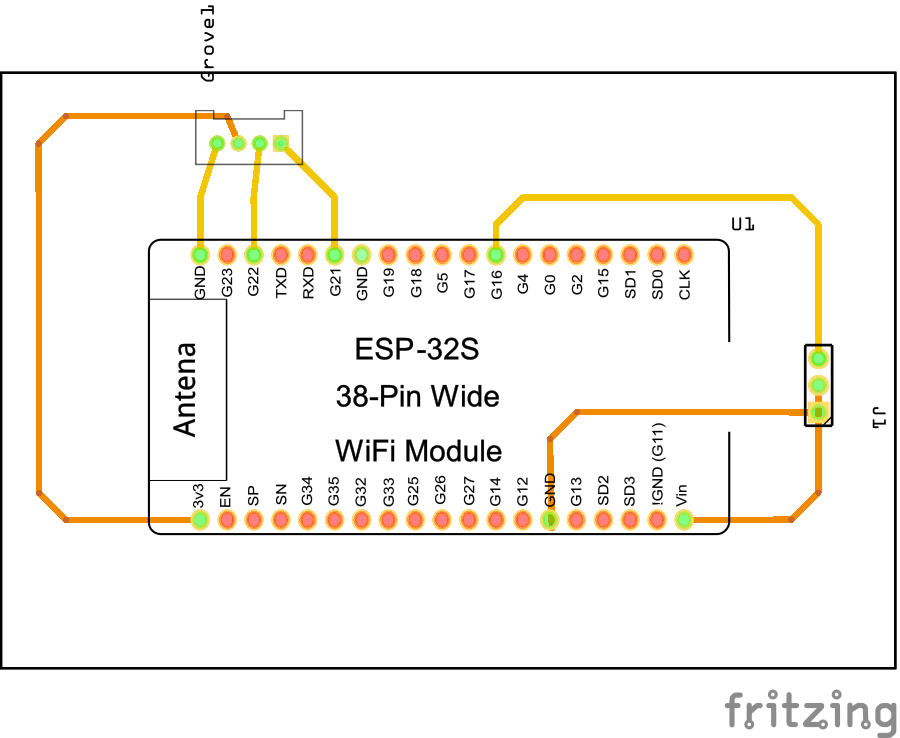
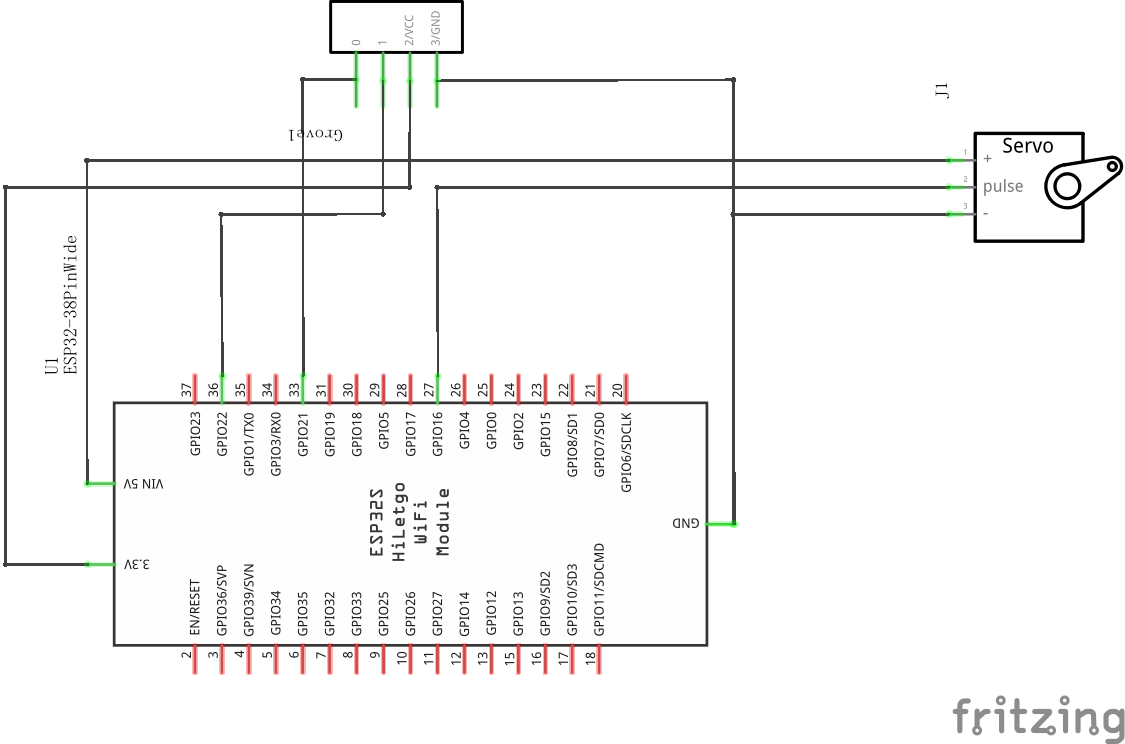
#define SDA 21
#define SCL 22
SSD1306 display(0x3c, SDA, SCL);
Servo myservo;
int pos = 90;
void kaideng(){
myservo.write(pos);
delay(2000);
myservo.write(pos+45);
delay(1000);
myservo.write(pos);
delay(2000);
}
void guandeng(){
myservo.write(pos);
delay(2000);
myservo.write(pos-45);
delay(1000);
myservo.write(pos);
delay(2000);
}
char auth[] = "从点灯科技获取";
char ssid[] = "ssid";
char pswd[] = "pswd";
bool oState[5] = { false };
void aligeniePowerState(const String & state, uint8_t num)
{
BLINKER_LOG("need set outlet: ", num, ", power state: ", state);
if (state == BLINKER_CMD_ON) {
digitalWrite(LED_BUILTIN, HIGH);
BlinkerAliGenie.powerState("on", num);
kaideng();
BlinkerAliGenie.print();
oState[num] = true;
}
else if (state == BLINKER_CMD_OFF) {
digitalWrite(LED_BUILTIN, LOW);
BlinkerAliGenie.powerState("off", num);
guandeng();
BlinkerAliGenie.print();
oState[num] = true;
if (num == 0)
{
for (uint8_t o_num = 0; o_num < 5; o_num++)
{
oState[o_num] = false;
}
}
}
}
void aligenieQuery(int32_t queryCode, uint8_t num)
{
BLINKER_LOG("AliGenie Query outlet: ", num,", codes: ", queryCode);
switch (queryCode)
{
case BLINKER_CMD_QUERY_ALL_NUMBER :
BLINKER_LOG("AliGenie Query All");
BlinkerAliGenie.powerState(oState[num] ? "on" : "off", num);
BlinkerAliGenie.print();
break;
case BLINKER_CMD_QUERY_POWERSTATE_NUMBER :
BLINKER_LOG("AliGenie Query Power State");
BlinkerAliGenie.powerState(oState[num] ? "on" : "off", num);
BlinkerAliGenie.print();
break;
default :
BlinkerAliGenie.powerState(oState[num] ? "on" : "off", num);
BlinkerAliGenie.print();
break;
}
}
void dataRead(const String & data)
{
BLINKER_LOG("Blinker readString: ", data);
Blinker.vibrate();
uint32_t BlinkerTime = millis();
Blinker.print("millis", BlinkerTime);
}
void setup()
{
Serial.begin(115200);
BLINKER_DEBUG.stream(Serial);
pinMode(LED_BUILTIN, OUTPUT);
digitalWrite(LED_BUILTIN, LOW);
Blinker.begin(auth, ssid, pswd);
Blinker.attachData(dataRead);
BlinkerAliGenie.attachPowerState(aligeniePowerState);
BlinkerAliGenie.attachQuery(aligenieQuery);
myservo.attach(16);
ssdinit();
}
void ssdinit(){
display.init();
display.setFont(ArialMT_Plain_10);
display.drawString(0, 0, "Hello World");
display.setFont(ArialMT_Plain_16);
display.drawString(0, 10, "Hello World");
display.setFont(ArialMT_Plain_24);
display.drawString(0, 25, "Hello World");
display.display();
}
void loop()
{
Blinker.run();
}
|